
Take your portrait photography to the next level
April 24, 2022
Today, it is extremely common for one to encounter having to take a photo of another person. Social media has taken over, creating a photo hungry society. With so many people becoming talented artists thanks to platforms like Instagram and its high demand for imagery, it is important that those who are seriously interested in conducting professional level portrait sessions are introduced to the basics of planning and executing a proper, high-quality photoshoot.
Step 1: Obtain your gear.
Having functional gear is the most obvious of steps, but it is crucial when planning for the quality of service you wish to provide. A camera, reflector, computer, and SD card are the basic must haves. They must be working properly to ensure a stress-free photoshoot. “Any Canon Rebel series camera is a suitable starter camera body for beginners,” said Lucas Huber, professional photographer and owner of Lucas Huber Imagery.
A flash can replace or be combined with the reflector. These external lighting modifiers are optional, although highly recommended for more control and better quality in low light settings.
For those with no access to a computer, an iPad or cell phone can also be used to post-process images.
Step 2: Plan a portrait photoshoot.
After you have established the gear that you will be using, decide which subject you want to photograph. You can ask family or friends if they would like to participate in a photoshoot of themselves. Choosing a subject is easier if you decide on a theme for your session. Common portrait themes are senior, engagement, and family portraits. Discussing possible wardrobe options and color schemes will help to establish your theme.
Once that is chosen, you will want to decide on a location for your photoshoot. It is important that you have permission to conduct a photoshoot at the location of your choice.
The final part of this step involves planning a date for this session to happen. The further ahead everything is planned, the more seamless of a portrait session you will have.
Step 3: Prepare needed props.
Once all the details are planned out for your photoshoot, it is time to move on to preparation. If any props were mentioned during planning, make sure to obtain them and have them ready for use. Thrifted items, including clothing, should be thoroughly washed before putting in use with your subject.
Step 4: Prepare poses and prompts.
For help with choosing poses, you can use Pinterest for inspiration and search for your session theme in the search bar.
Another app you can use for inspiration is Unscripted. This app is focused on posing prompts and has each category separated by session type and number of subjects. Under each pose is a verbal prompt that you can present to your subject to trigger photo-worthy moments.
Carefully planning potential poses can speed up the shooting process, and, overall, create a more professional atmosphere for you and your subject.
Step 5: Prepare your gear.
To conclude your prep, make sure your camera is set to RAW in the camera menu. Then, plug in gear to charge. When everything is fully charged, pack your gear away so that it is ready to go the next day.
Step 6: Arrive for photo session.
On the day of the session, meet up with your subject at the location that was planned. It is extremely important to arrive at least 15 minutes early so that you can ensure all your gear is setup and working properly. Greet them and introduce them to the location that you will be shooting in.
Step 7: Begin taking portraits.
Once you have gained familiarity with your subject and surroundings, start using your planned posing prompts to guide your subject throughout the session.
Do not be afraid to get different angles and try new things out as they come to your mind. The best part about being a photographer is that you are in control of the camera and how it interprets the world around you.
Keep a good eye on your focus point. A pro tip for taking portraits is to move your focal point to the subject’s eye that is closest to the camera. That will ensure sharp focus almost every time.
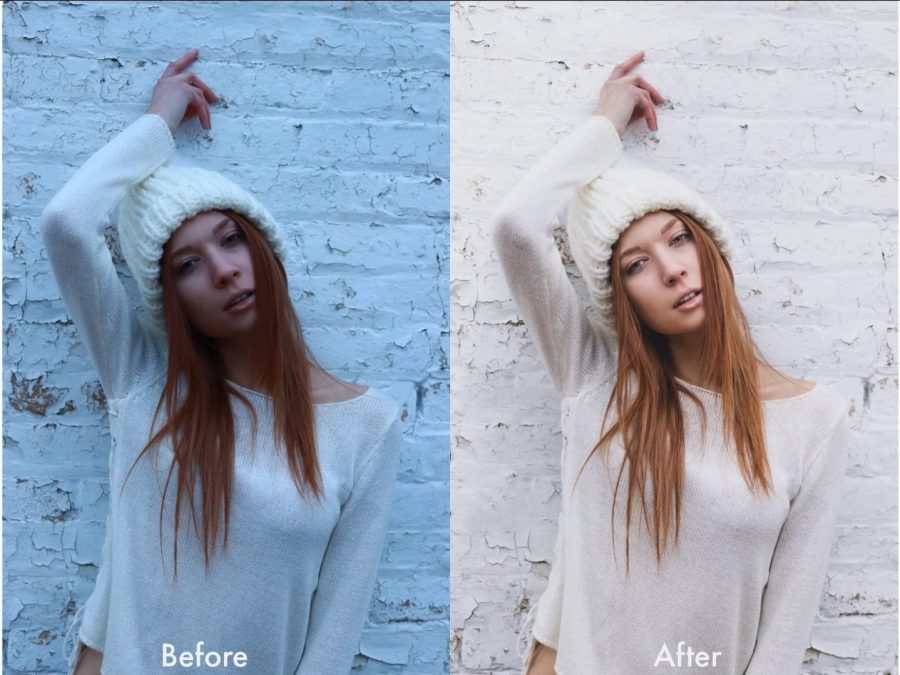
Step 8: Edit photos on Lightroom or Photoshop
Editing your photos will be what turns your image from average to the professional finish for which most artists aspire.
To start the post-production process, transfer your SD card from your camera to your computer or iPad. Import your photos to Adobe Lightroom or Photoshop using the prompts that each program provides.
Between lighting, colors, and effects, there are plenty of settings that you can adjust to your liking. Adding clarity to the eyes in a portrait is a great way to make the subject stand out.
Remember to export your final images in high resolution and 300dpi if you plan on printing any of them.
Step 9: Deliver portraits to subject.
If the session was arranged to be shared, upload the final images to a USB drive and deliver to your subject.
Sharing galleries online is another method of delivery and can be done through hyperlinks on gallery-based sites such as ShootProof and Pixieset.
Step 10: Be proud of your art!
Taking pride in your final artwork, no matter what, will be what drives you to continue practicing the art of portrait photography. Every artist sees something different and the whole point of photography is to explore that idea for yourself.